- Routinely performing pull-ups during your workouts is one of the best ways to build muscle and get stronger – so long as you’re doing them correctly.
- Even if you’re unable to do a single pull-up right now, there are exercises you can incorporate into your workouts to help you build toward them.
- Once you’re comfortable on a pull-up bar, adding one to your home gives you the ability to perfect your technique and allows you to work out whenever you see fit.
- For a more comprehensive round-up of gear, take a look at our buying guide of the best pull up bars.
If you’re looking to get stronger or build toned muscle, then the pull-up should be at the very top of your exercise priority list. As the NYC-based personal trainer, Brad Baldwin, puts it, “The pull-up is the king of back exercises for creating that coveted V-shaped torso and getting stronger.”
Baldwin, who also has his bachelor’s degree in exercise physiology, points out that pull-ups force you to stay vertical, as opposed to the cable pulldown which has the ability to let people lean too far back. Pulling with your own body weight is more intense, he added, as it’s heavier than what most folks would do on a pulldown.
“It forces you to work at a higher intensity.”
How to do a pull-up
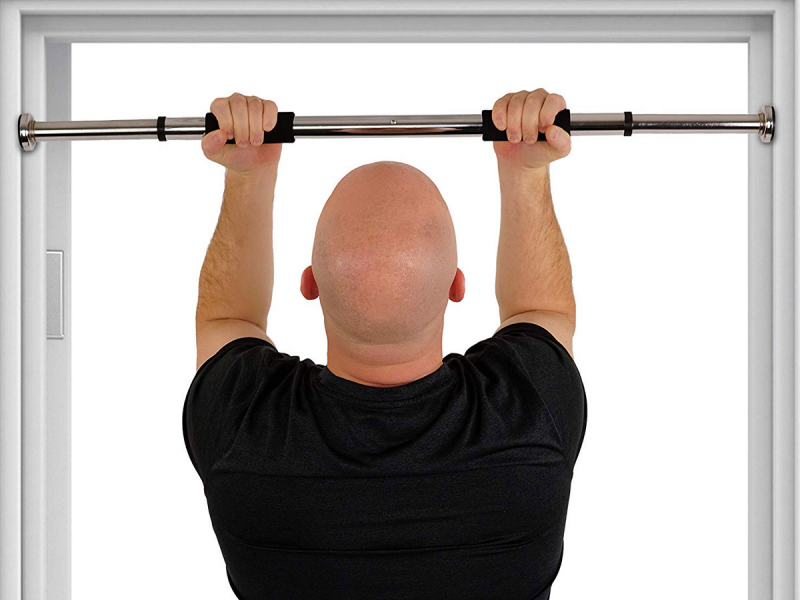
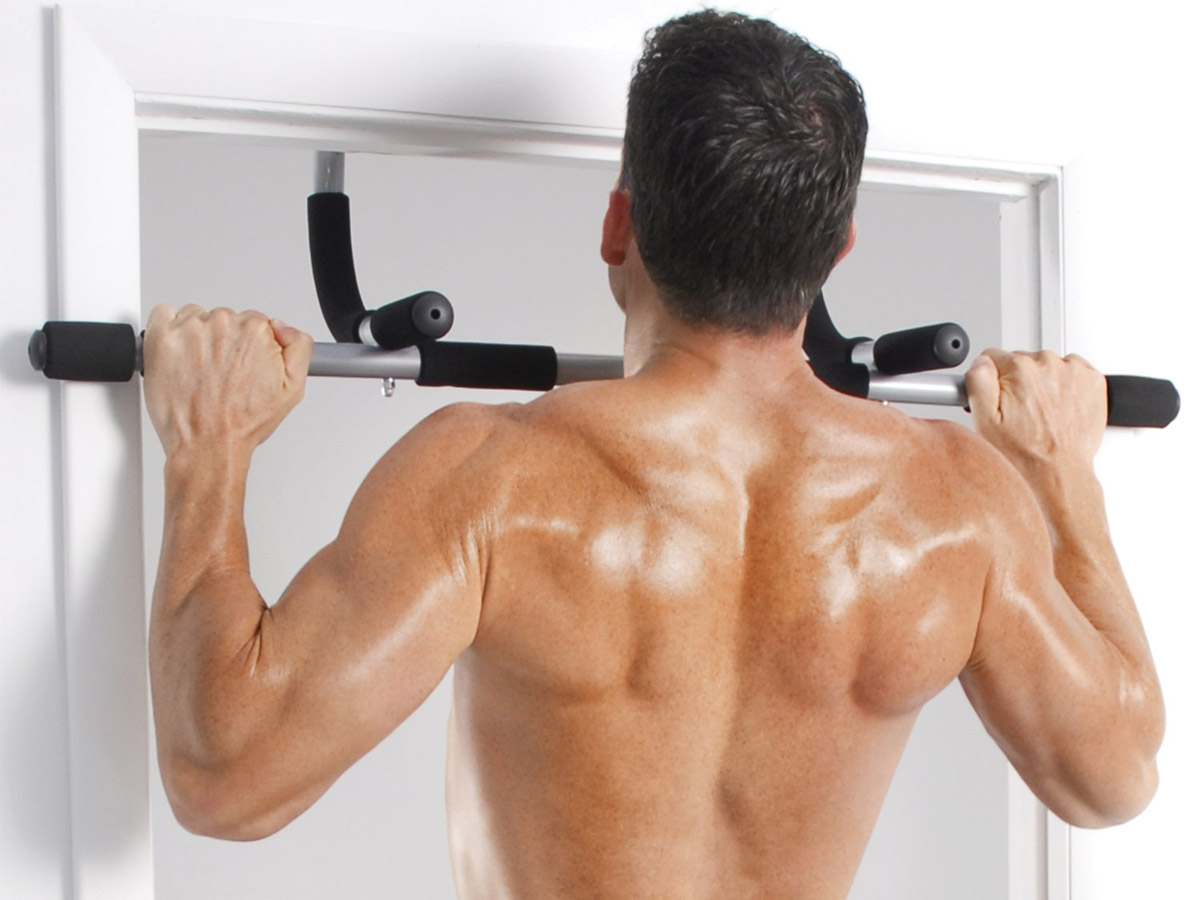
In theory, the pull-up is simple to execute. Find a sturdy bar that supports your body weight and grab onto it with a shoulder-width grip. Let your arms fully extend and make sure your feet are off the ground, so your entire body is suspended. Then, pull with your arms, drawing your elbows down until your chin is level or above the bar. Lower yourself back down with control, keeping your feet off the ground.
That said, the devil is in the details when it comes to proper pull-up form. There are two common mistakes that Baldwin sees:
- People not squeezing their shoulder blades together and down before doing a rep, and
- Kipping, where you use momentum to get yourself up and over the bar.
"Your lats (the biggest muscle in your back) are designed to pull your shoulder blades together and down," Baldwin said. "That's their function, so putting them in that position before pulling ensures they're more activated throughout the move."
As for kipping, Baldwin isn't against it but considers it a completely different exercise meant exclusively for CrossFit. "If you want to build strength and muscle in your back," he added, "then skip the kip."
Do your first pull-up
If you're not able to do a pull-up yet, don't sweat it. Baldwin says this is common, and he has an easy routine for you to do twice a week.
Step 1: Isometric holds (Three timed sets)
First, you'll perform three sets of isometric holds. This is where you jump up so you're in the top position of a pull-up and hold yourself there for as long as possible.
Record your time for all three sets and aim to beat your times next session.
Step 2: Negative pull-ups (Two sets of three reps each, adding an additional rep each week)
Once you're comfortable with isometric holds, you'll then move on to negative pull-ups. This exercise also starts with you jumping up to the bar so that you're in the top portion of a pull-up, except now you'll lower your body until your arms are fully extended to a count of four seconds.
"These are hard, especially after isometric holds," Baldwin says. "Do two sets of two to three reps, and aim to add a rep each week."
Step 3: Try your first pull-up
Baldwin recommends waiting to try your first pull-up until the end of the month that you've started steps 1 and 2. If you feel comfortable enough with the above two exercises, there's really no right or wrong time to try. Ultimately, it's up to how you feel.
"You'll probably want to try here and there until you eventually get one," he added. "Of course, how quickly that'll happen depends on your training experience and how much you weigh."
Until then, keep repeating the above bi-weekly sessions.
Step 4: Incorporate a pull-up routine into your workout
Once you're able to do three consecutive pull-ups, Baldwin recommends following this pull-up program from StrongFirst which offers different plans based on how many max reps you can do.
Investing in a pull-up bar for your home can be an excellent motivator, regardless of how much progress you have (or haven't) made. The accessibility alone should help you improve both the number of pull-ups you're able to accomplish, as well as your form.
Here are a few pull-up bar recommendations for people of any skill level. Take a look at our pull-up bar buying guide for other at-home options, as well.
Three pull-up bars for your home
The Rogue Jammer Pull-Up Bar
Rogue has become an industry standard for quality fitness products and its pull-up bar is no exception. It's made from laser-cut steel, features a bar that's 1.1-inches in diameter (for an easier grip), and comes with lines etched into the steel to keep your hands from slipping (called knurling). It's not a complete eye-sore, either, which is nice considering it'll hang above your door.
There is a drawback, however: the bar installs via drilling the mount into a wood stud wall. This means that once it's up, it's up for good - or, at least until you disassemble the whole thing. The Jammer looks sleek for a pull-up bar but it's understandable if you don't want this 33-pound apparatus being a permanent door decoration.
Or, you could look at it this way: Every time you walk under the bar, do one pull-up. That's it. By the time the day is over, you could accumulate around 20 or so. Multiply that by 365 and you just logged 7,300 reps in a year.
Iron Gym Total Upper Body Workout Bar
If you've ever mindlessly channel surfed (I'm talking the pre-Netflix kind), then at some point, you've likely stumbled upon a commercial for the Iron Gym Workout Bar. You know, the one where a muscular guy builds the body of his dreams with nothing more than this do-it-all bar. If you haven't seen it (and you should), here are the upsides.
First, the bar secures to most door frames for immediate access to pull-ups. It comes complete with three grips - narrow, wide, and neutral - to challenge your arms, shoulders, and back in a variety of ways.
Assembly is a breeze, too, taking roughly five total minutes. Once you're done working out, it stores easily in any closet or under your bed. And let's not forget that you can also use it for pushups, triceps dips, and crunches.
One downside to this bar is that it's not compatible with every door frame; it needs to be 24- to 34-inches wide, 5.5-inches thick, and have a trim width of 3.5-inches so the top part of the bar has a base to sit on. It also has a weight limit of 300 pounds, which shouldn't impact most people but a fact to consider, nonetheless.
Since it's not drilled into the wall, there's the likelihood the bar slips out of position. This isn't a common occurrence and can be avoided as long as you're not constantly jerking around when doing pull-ups.
Sunny Health & Fitness Doorway Chin-Up and Pull-Up Bar
For under $20, you can't do much better than this bare-bones pull-up bar. Installing requires you to drill two brackets into either side of your doorframe and then extend the telescopic bar to fits into them. This creates security for anyone up to 220 pounds.
What's nice is that you can even install the bar and still close or open your door without interference. It also comes equipped with a foam pad for a more comfortable grip.
The only real negative is the weight limit and the fact that you're likely to thump your head on the top of your door if you're not careful. All in all, it's what you need and nothing more. It gets the job done - and saves you some money in the process.